|
|
|
|
|
Topic: Old school/poor mans Schroeder steering box
|
Email this topic to a friend |
Subscribe to this Topic
| Report this Topic to Moderator
|
|
Page 1 of 2 of 20 replies
|
|
|
|
December 17, 2008 at
12:09:27 AM
|
|
|
Joined:
|
12/03/2006
|
|
Posts:
|
7918
|
|
|
|
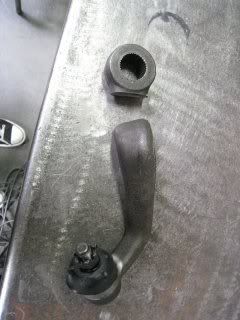
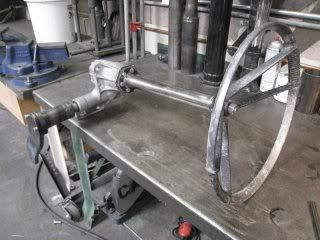
I'll try to be as complete with this as possible. Chris Casny of Hollywood Hills, CA has come up with a neat steering box idea.
The box itself is out of a 1966 Mopar product.
The first thing he did was cut off the pitman arm as shown here-
|
|
|
|
|
December 17, 2008 at
12:11:48 AM
|
|
|
Joined:
|
12/03/2006
|
|
Posts:
|
7918
|
|
|
|
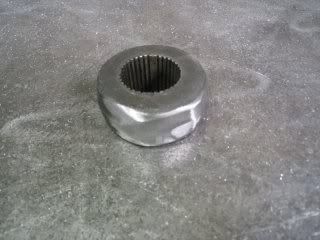
Then he ground the bottom of the splined female piece round
|
|
|
|
|
December 17, 2008 at
12:14:33 AM
|
|
|
Joined:
|
12/03/2006
|
|
Posts:
|
7918
|
|
|
This message was edited on
December 17, 2008 at
02:25:32 AM by brian26
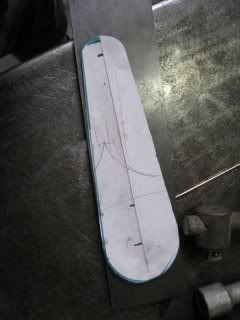
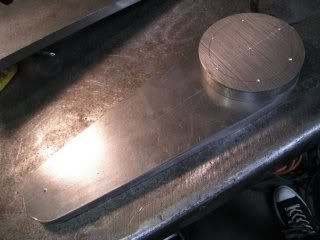
Next he laid out a pattern for the pitman arm in cardboard then he cut that shape from 1/2" plate. 7" long for this one since it is a manual box.
|
|
|
|
|
|
|
December 17, 2008 at
12:20:17 AM
|
|
|
Joined:
|
12/03/2006
|
|
Posts:
|
7918
|
|
|
This message was edited on
December 17, 2008 at
02:37:39 AM by brian26
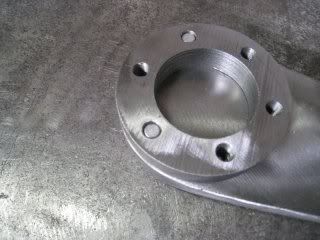
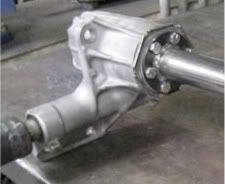
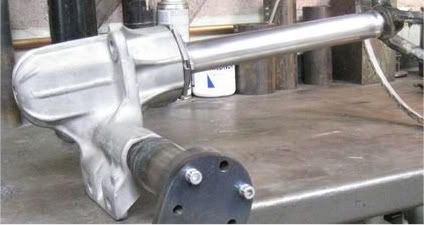
Cut a piece out and shaped it on a lathe to fit over a tube coming from the box. In this case he used 2 1/8". One might be able to use 2 3/8" upset oilfield tubing(toss the upset piece to the junkpile), cutting the outer diameter of the flange shown here down to internal diameter and fit both pieces together since 2 1/8" could be hard to find. I do know 2 3/8" upset oilfield tubing has a 2" outer diameter behind the upset. The jury is out on whether 2 3/8" oilfield tubing is good enough to use on anything but oilfield work. I've seen FRAMERAILS on a super made from the stuff. I would avoid tubing that is magnetized however, hard to trust the welds.
The internal diameter needs to be big enough to allow for a socket to tighten the nut on the end of the output shaft for the box.
|
|
|
|
|
December 17, 2008 at
12:24:41 AM
|
|
|
Joined:
|
12/03/2006
|
|
Posts:
|
7918
|
|
|
This message was edited on
December 17, 2008 at
12:29:33 AM by brian26
|
|
|
|
|
December 17, 2008 at
12:40:03 AM
|
|
|
Joined:
|
12/03/2006
|
|
Posts:
|
7918
|
|
|
Reply to:
Posted By: brian26 on December 17 2008 at 12:11:48 AM
Then he ground the bottom of the splined female piece round
|
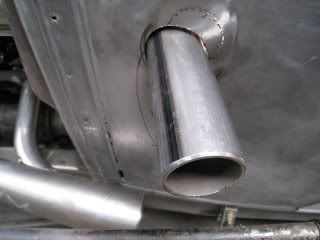
This piece was welded inside of the tube. From here you can see. Might be an idea to put a step into the piece above to give it a solid place to stop. If a bead causes too much heat and shrinkage,(not sure), might be an idea to spot weld around after drilling a few holes? He'll be looking in to see this story and correct me as needed.
Also the tube has the nut inside to tighten the splined piece to the box. Just need a strong extension and a big breakover to do that.
|
|
|
|
|
|
|
December 17, 2008 at
12:45:31 AM
|
|
|
Joined:
|
12/03/2006
|
|
Posts:
|
7918
|
|
|
Reply to:
Posted By: brian26 on December 17 2008 at 12:24:41 AM
|
The flange was welded to the tube on the backside, keep in mind to set the steering to center(in the middle of lock-to-lock) before placing pitman arm and flange assembly over the tube.

|
|
|
|
|
December 17, 2008 at
12:55:57 AM
|
|
|
Joined:
|
12/03/2006
|
|
Posts:
|
7918
|
|
|
This message was edited on
December 17, 2008 at
12:57:21 AM by brian26
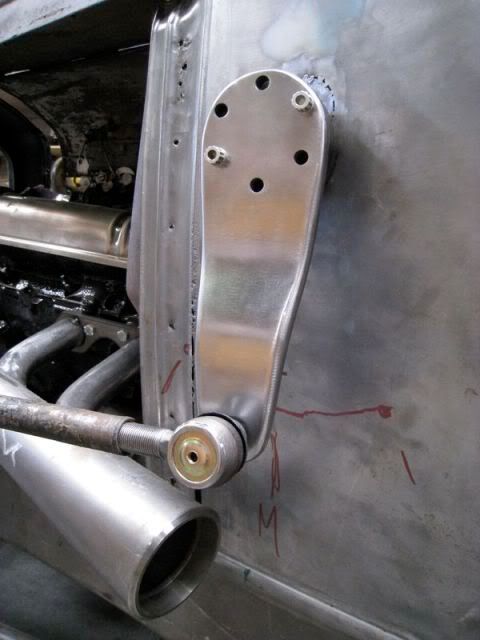
Here you can see the flange he made to bolt up a new tube to the box. Also note the mounting holes-2 on bottom and 1 on top
|
|
|
|
|
December 17, 2008 at
01:01:18 AM
|
|
|
Joined:
|
12/03/2006
|
|
Posts:
|
7918
|
|
|
|
|
|
|
|
|
|
|
December 17, 2008 at
01:04:30 AM
|
|
|
Joined:
|
12/03/2006
|
|
Posts:
|
7918
|
|
|
This message was edited on
December 17, 2008 at
02:39:17 AM by brian26
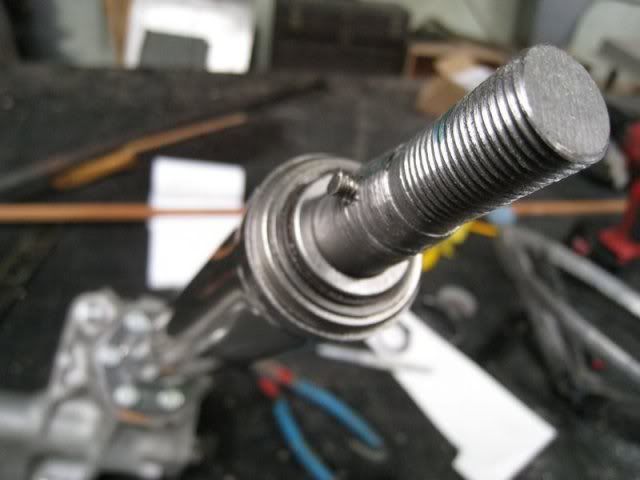
Shaft inside is a stock-shortened piece that is rethreaded on the end. Also a bearing was pressed in to hold the shaft in place. I need to find out those sizes
|
|
|
|
|
December 17, 2008 at
01:13:07 AM
|
|
|
Joined:
|
12/03/2006
|
|
Posts:
|
7918
|
|
|
|
Test fitting is of course a big thing to do. Keep in mind that bump steer is an issue with solid axle setups like ours. In most cases like a street rod you are dictated to put the box and wheel where they fit, bump steer or not.
|
|
|
|
|
December 17, 2008 at
01:16:35 AM
|
|
|
Joined:
|
12/03/2006
|
|
Posts:
|
7918
|
|
|
|
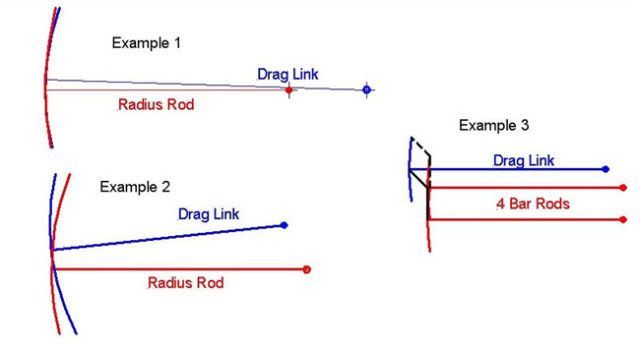
In an ideal world we would get to put the box where it works best without bump steer. Some state that as long as the drag link is level, bump steer is minimal. This diagram goes a bit further to say the drag link needs to be also in line with the radius rod.
TRUTH IS, YOU HAVE TO FIND A HAPPY MEDIUM. There is another way to address bump steer from here.
|
|
|
|
|
|
|
December 17, 2008 at
01:22:11 AM
|
|
|
Joined:
|
12/03/2006
|
|
Posts:
|
7918
|
|
|
|
Pitman arm length in my opinion is up to the driver. Each one has his own reaction time and a preference for feedback against the hand. Once again a happy medium, in this case the arm is 7".
A little rounding of the edges and polishing do a lot of help in the looks department.

|
|
|
|
|
December 17, 2008 at
01:23:46 AM
|
|
|
Joined:
|
12/03/2006
|
|
Posts:
|
7918
|
|
|
|

|
|
|
|
|
December 17, 2008 at
01:24:46 AM
|
|
|
Joined:
|
12/03/2006
|
|
Posts:
|
7918
|
|
|
|
Chime in if I've missed anything. Luther, I'd really like to hear your input.
|
|
|
|
|
|
|
December 17, 2008 at
01:57:53 AM
|
|
|
Joined:
|
12/03/2006
|
|
Posts:
|
7918
|
|
|
Reply to:
Posted By: brian26 on December 17 2008 at 01:16:35 AM
In an ideal world we would get to put the box where it works best without bump steer. Some state that as long as the drag link is level, bump steer is minimal. This diagram goes a bit further to say the drag link needs to be also in line with the radius rod.
TRUTH IS, YOU HAVE TO FIND A HAPPY MEDIUM. There is another way to address bump steer from here.
|
http://www.nationaltbucketalliance.com/tech_info/chassis/Bumpsteer/index.asp
|
|
|
|
|
December 17, 2008 at
02:01:00 AM
|
|
|
Joined:
|
12/03/2006
|
|
Posts:
|
7918
|
|
|
|
Scroll down until you see his work on the steering. From there he answers a lot of questions
http://www.jalopyjournal.com/forum/showthread.php?t=260588&highlight=dreadman&page=11
|
|
|
|
|
December 17, 2008 at
02:17:11 AM
|
|
|
Joined:
|
12/03/2006
|
|
Posts:
|
7918
|
|
|
This message was edited on
December 17, 2008 at
02:21:25 AM by brian26
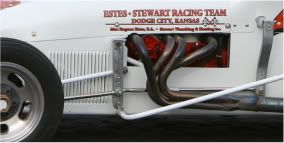
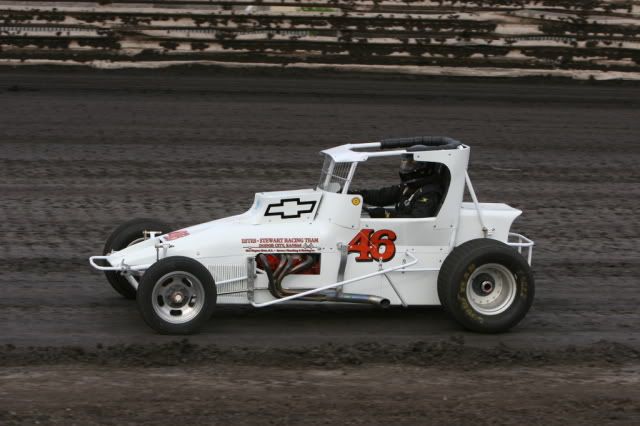
This is an old trick from the Indy Roadsters. Max Estes had an issue with clearing the headers, so he took an old torsion bar and a partial from a torsion tube and made a midway connection. He cleared the headers just fine, BUT he also gave more clearance for the left front wheel to turn as well as give some adjustment for steering speed. It just happened that he nearly eliminated bump-steer. That's four birds killed with one stone.
This frame looks like an 80's champ car frame. They work pretty good since their frames/cages fit inside of the older style bodies.
|
|
|
|
|
|
|
December 17, 2008 at
02:41:49 AM
|
|
|
Joined:
|
12/03/2006
|
|
Posts:
|
7918
|
|
|
This message was edited on
December 17, 2008 at
02:42:39 AM by brian26
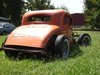
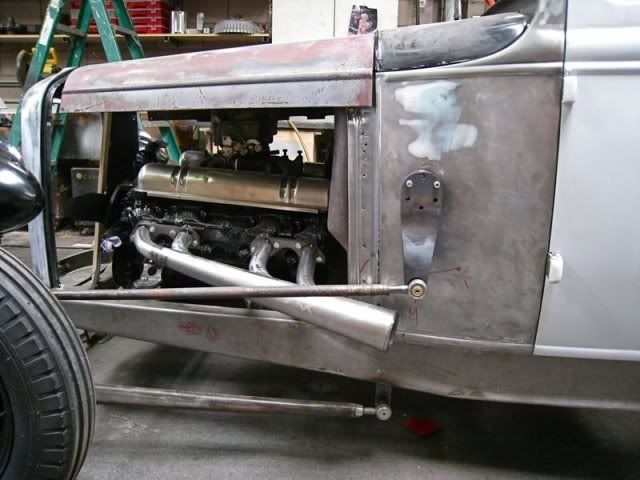
I just love this look. If my '33 Chevy coupe wasn't a real reminder of how things were back in the late 60's for a poor boy, I'd make one of these for it.

|
|
|
|
|
December 17, 2008 at
02:47:22 AM
|
|
|
Joined:
|
12/03/2006
|
|
Posts:
|
7918
|
|
|
Reply to:
Posted By: brian26 on December 17 2008 at 12:14:33 AM
Next he laid out a pattern for the pitman arm in cardboard then he cut that shape from 1/2" plate. 7" long for this one since it is a manual box.
|
The best ways I know to get something like this cut, this clean, is either water jet, plasma, or a vertical industrial scroll saw. Of course a jagged edge left behind from a torch IS PERIOD CORRECT.
|
|
|